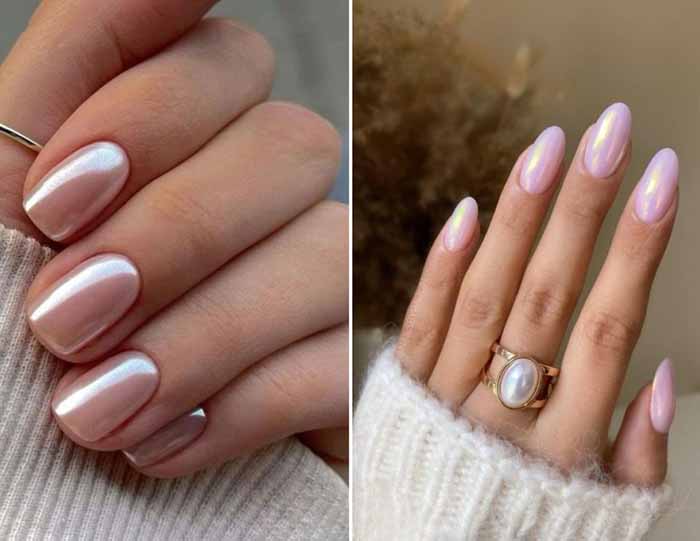
You’ve just finished painting your nails. They look flawless. Two days later, chips appear at the tips, the edges are worn, and the color looks faded. You’re not alone. Nail polish seems to have a mind of its own—but the truth is, the longevity of your manicure depends almost entirely on how you prepare your nails and how you apply the polish.
Here’s why polish fails and exactly what you can do to make it last.
Why Nail Polish Chips and Peels
The most common cause of premature chipping is poor adhesion. Your natural nail plate has oils, moisture, and microscopic dust particles that create a barrier between the polish and the nail. When you paint over these barriers, the polish sits on the surface rather than bonding to it. The result? Peeling, lifting, and chipping within days.
Other factors include thick application, failure to seal the free edge, and skipping base and top coats. The good news is that every one of these issues is fixable.
Why Nail Preparation Is the Most Important Step
Preparation is the foundation of a long‑lasting manicure. You would not paint a wall without cleaning and priming it first. The same principle applies to your nails.
Proper preparation removes oils, evens out the surface, and creates a slightly rough texture for the polish to grip. Without it, even the most expensive polish will fail. According to nail expert “The Nail Artisan,” the most important part of prepping is pushing back the cuticles, as even microscopic cuticle residue prevents proper adhesion.
8 Proven Tips for a Long‑Lasting Manicure
1. Remove All Oils from the Nail Surface
Before you even open your polish bottle, wipe each nail with rubbing alcohol or a nail dehydrator. This removes natural oils, hand cream residue, and dust. Do not touch your nails after this step—finger oils transfer instantly and ruin adhesion.
2. Never Skip the Base Coat
Base coat is not optional. It creates a sticky surface that helps the polish bond to your nail, prevents staining, and provides a smooth foundation. Apply one thin layer and cap the free edge.
3. Apply Polish in Thin Layers
Thick layers are the enemy of longevity. They take longer to dry, trap air bubbles, and peel more easily. Apply two to three thin coats of color instead of one thick coat. Each layer should look almost transparent before drying.
4. Seal the Free Edge with Every Coat
The free edge is the most vulnerable part of your nail. Water and friction enter through the tip and cause chipping. Run the brush along the nail tip with every layer—base coat, color, and top coat. This seals the edge and prevents water from seeping underneath.
5. Wait for Each Layer to Dry Completely
Rushing between coats creates a soft, unstable base that shifts and chips. Allow each layer to dry fully before applying the next. For regular polish, wait 2‑3 minutes between coats. For gel, follow the manufacturer’s cure time.
6. Apply Top Coat and Reapply Every Few Days
Top coat seals everything in and adds shine. Apply a generous, even layer at the end of your manicure. Then, reapply a thin layer of top coat every 2‑3 days. This refreshes the shine, seals any microscopic edge wear, and can add several days of life to your manicure.
7. Let Your Manicure “Set” After Finishing
Once your top coat is dry, your nails are not fully hardened. Wait at least 30 minutes—ideally an hour—before exposing them to water or heavy use. This gives the polish time to cure fully and harden.
8. Protect Your Hands in Daily Life
Water, cleaning products, and physical trauma are the fastest ways to ruin a manicure. Wear gloves when washing dishes or cleaning. Avoid using your nails as tools—no opening cans, peeling stickers, or scraping. These habits make a measurable difference.
Daily Habits That Extend Manicure Life
Beyond the application process, your daily habits shape how long your manicure lasts.
Moisturize your cuticles daily. Apply cuticle oil morning and night. Healthy, hydrated cuticles keep the skin around your nails flexible, which reduces lifting at the edges.
Wear gloves for chores. Dishwashing, gardening, and cleaning expose your nails to water and harsh chemicals. A simple pair of rubber gloves protects your manicure and your natural nails.
Avoid hot water when possible. Hot water softens polish and makes it more prone to chipping. Use warm or cool water for hand washing when you can.
Reapply top coat regularly. This is one of the easiest ways to extend wear. A fresh layer of top coat every few days refreshes shine and seals edges before chips start.
Be mindful of how you use your hands. Opening cans, peeling stickers, and scraping labels with your nails creates lateral pressure that leads to chipping. Keep a small tool nearby for these tasks.
The Bottom Line
A long‑lasting manicure is not a mystery. It starts with thorough preparation, continues with thin, careful application, and ends with consistent aftercare. Remove oils, use a base coat, apply thin layers, seal the free edge, and protect your hands. These simple steps will transform your manicure from a three‑day disappointment into a two‑week success story.